The Ork war trukk is one of the vehicles used by the orks when they rush into war with the Imperium and other aliens on their periodic Waaghs.
Bilt by meks for uz speed freeks, the trukk allows the boyz ter keep up wiv the impies wen they starts ter run!
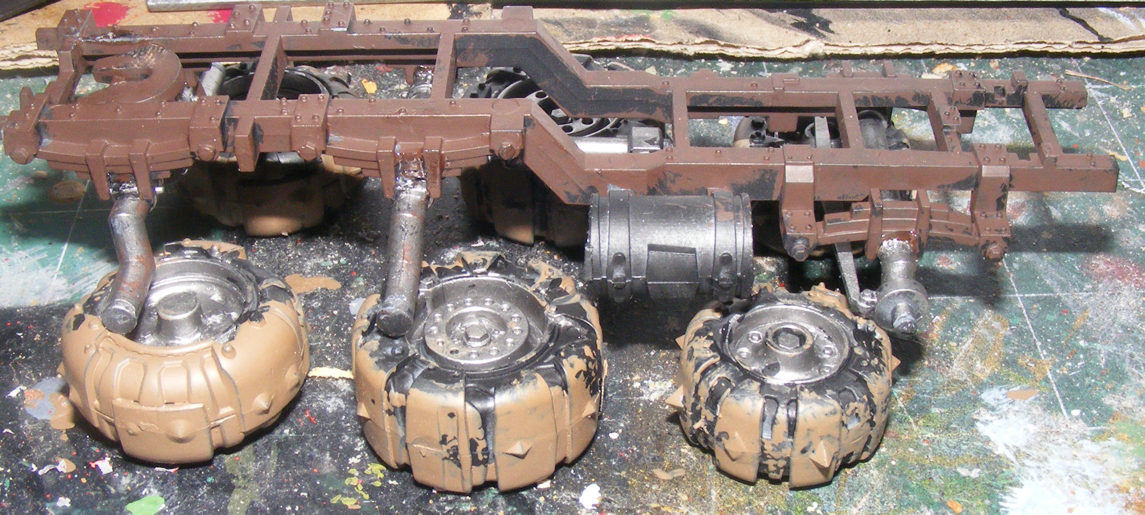
Da most important fing ter start wiv is a solid chassis. Make it good an' strong so's yer can hit fings wiv it! Add some big weels wiv pointy stuff attatched so's they do loads of damage.

Wiv de weels in place, you can add da engine. Dis needs ter be big, wiv plenty of oof, cos we wants ter make the trukk go way fast
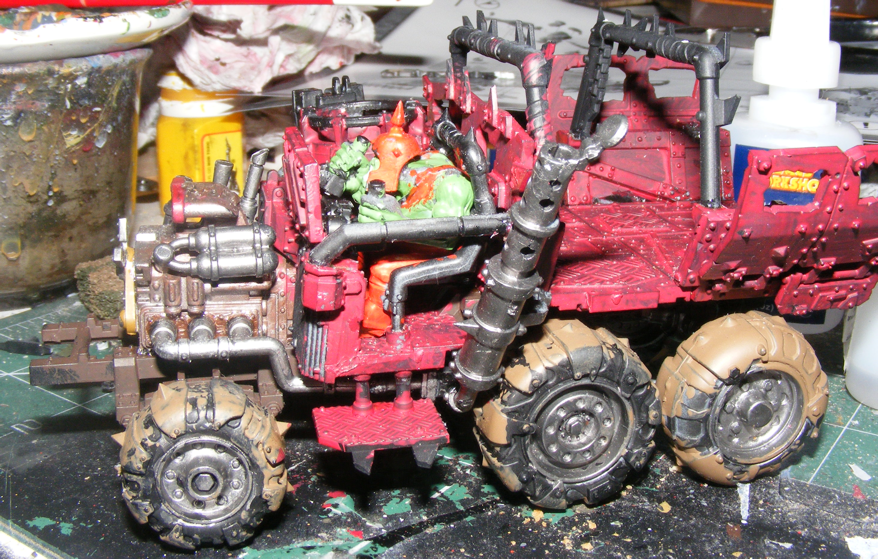
Once the engine's in place, add on the armoured floor an' sides. Den yuse can paint the body a great red cos uz speed freeks knows that red makes fings go screeming fast.

Wiv the trukk bilt an' ready ter roll, all dat's missin' is de impies...
This should have been a great vehicle to build, but I've never had that much luck with Ork stuff, don't really know why, and this was no exception.
The chassis was painted in scorched brown with highlighted bits in bolt gun metal. The engine block went the other way - a base coat of bolt gun metal and overpainted with scorched brown. The rather overdone muck on the wheels is graveyard earth and was applied by rolling the wheels over a sponge soaked in the paint. The rear section of the trukk went together well and mated to the chassis and driver's compartment equally effiently.
The next stage was assembling the gun bucket and exhaust assembly. Don't be tempted to try to assemble the gun bucket so it can rotate - this won't work!
The plans show the crashbar on the driver's side being added at this stage as well, but I would advise that this is left off until you've got the driver in place. This will be a tight enough fit anyway but with the crashbar there it proved impossible. I would also suggest that you leave off the exhaust stack otherwise you'll probably find it coming off anyway :-).
With the wrecking ball, I have to admit I was the author of my own misery. I had put the ball onto the chain before trying to attach it to the trukk so it kept pulling off it's anchor point. Again, the chain was painted in scorched earth with boltgun metal highlights where it would have been kept bright in the deployment process. Unfortunately, I had my usual (lack of) luck in getting the stubba gun to stay in place and so with a bit of bad luck with the gunner and the gun bucket as well, I chopped off a bit of the gunner and painted him to make it look like he'd taken a fatal blow that had also smashed the stubba off...
Getting the gangways to go up and down smoothly almost worked but it proved a bit fiddly to attach both hinges so they would go in straight. Things may have gone better if I had waited until after these had been added before adding the wheels.
I have to say this was not my favourite construction kit and the instructions could have been clearer as to where the pieces went but it still looks rather cool.
Click here to return to the War Hammer images index.